


Freedom is one of the most important gifts you can give your child to encourage creativity. I have already spoken about allowing them to create without being hindered by your expectations. One way you can encourage freedom is by making them an art box. This is something they can get into whenever they choose and do what ever project they want. When my daughter was 5 I fixed a little child-sized table for her by my worktable. She had a box full of supplies to choose whatever she might be inspired by that day. She would work for long periods along side me. And rather than feeling neglected by my work time, she felt we were partners in that time. Her box was filled mostly with supplies I decided I did not need. She had scraps of pretty papers, old buttons, wooden shapes, old greeting cards, tiny papier mache boxes, and more. Then of course, there was the standard pencils, markers, glue sticks, and of course glitter. Yes, you heard me. I said glitter. I know it makes a mess. That's ok. You will live. That's why you have a vacuum sweeper. But we did save paint for more supervised times. But even that changed when she was older.
The last item I want to emphasis is to give your child quality supplies. I don't mean that you should buy professional supplies for children. But you should provide them with supplies that will help them find success. Those paint brushes with stiff nylon bristles that come with children's paint are horrible and pretty impossible for accomplishing anything except stirring glue. Or you could use the end of the handle for creating dots. The buttons that my daughter used were from my stash of vintage buttons. But I gave her the ones I knew I would never use. Shop at garage sales or thrift stores or the bargain bins at craft stores. This doesn't have to be an expensive thing. Learn to recycle. For instance, those wavy cardboard bands that come on tea and coffee -- way cool paper! Cut it into shapes, paint, and glue away. You can get outdated books of wallpaper for free from your paintstore. When I teach children's classes we use Prang colored pencils. They are by far not the quality of Prismacolor. But they will blend a bit and cover pretty well. Most other children's colored pencils are more of a frustration to the budding artist.

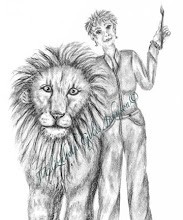
Here is a picture of a collage created by one of my students. In this project as a class we first drew the elephants - freehand. Then the kids took various papers of their choice and created an environment for their elephant. They had the freedom to place their elephant anywhere they wanted - a jungle, sitting on their couch, eating at the table, playing in the swimming pool. My only rule for animal art is that they can not put them in a cage or on a chain. The artist that created this piece is 8 years old. I especially like her Weeping Willow tree.
Here are a few more ideas for you before I end this series.
*Let your kids make the card before they go to a birthday party.
*Or they could make a calender for grandparents. They can draw a picture for each month of the year and you can print them with the calender pages.
* They will really feel special if you take one of their drawings and use the special printer paper, make an iron on for their tshirt of their own art.
Please do not copy or download this student's art. It is her art and not mine to let you copy. Thank you for respecting that.


8 comments:
I've enjoyed your series, Elizabeth, even though my "little ones" are all grown up now. I shall tuck these tidbits away for the little ones they'll give me someday.
A suggestion I'd like to add (with a nod back to that messy glitter), is that very inexpensive tarps can be purchased at most dollars stores in a small 4x6 foot size and are just perfect to spread out under your child's work area. When they're done arting, simply pick up the four corners and dump over a waste barrel. I found that my vacuum tended to clog after some time. So, the tarp method is vacuum-friendly.
I love this and hope to do the same with the art table/box some day when I have my own kids ;0) I love recycling for art materials too, for myself and when working with kids, I've also used the recycled wallpaper books, really fun, made block prints on them/great for collages etc! wonderful post, I love the elephant project, and the 1 rule! :) Michele
Thanks for the tarp idea, Bren.
Thanks for this wonderful series! I really enjoyed it!
This has been a great series! Wonderful tips.Love the iron on idea.
When my son was in the highchair we bought a sturdy plastic mat to put under it. (He liked playing toss more than eating - LOL) Still use it just like Bren suggests & keep it in his art box.
Very fun! Great ideas =) I agree about the quality of the art supplies and the tarp is a good idea. The last time we used glitter, daughter, grandkids and I all moved outside and glittered with no worries at all.
I like the idea of making things for the grandparents. This Grammy loves to have the artwork. My daughters girls have a folder for each of thier close family members. As they create artwork they choose which folder it will go into. When I go to visit, the girls proudly present me with the contents of my folder! It is very fun for both of us =)
Very, very sweet.
another super post Elizabeth!! thank you I have thoroughly enjoyed reading them.
My 5 year old and 3 year old nieces are already accomplished/practised artists(!:) - thanks to their wonderful parents and my mum, their gran! plus all their gifts from me are handmade and vice versa. I love the art box idea and I think it may make the best present! thanks!
Post a Comment